Migrate from Redis®* to Aiven for Redis®* using Aiven Console
Redis®* is an open-source, in-memory data structure store used as a database, cache, message broker, and streaming engine.
Migrating your Redis®* databases, whether on-premise or cloud-hosted, to Aiven for Redis®* managed service is straightforward. The Aiven console provides a guided wizard to assist you with the migration process.
Migrating from Google Cloud Memorystore for Redis is not currently supported.
The version of the source Redis service cannot be higher than the version of the target Aiven for Redis®* service.
Prerequisites
Before starting the migration process, ensure you have the following:
- A target Aiven for Redis®* service. To create one, see Get started with Aiven for Redis®*.
- Source database information:
- Hostname or connection string: This is the public hostname, connection string, or IP address used to connect to the database. Refer to accessible from the public Internet.
- Port: The port used to connect to the database.
- Username: The username used to connect to the database. Ensure this user has sufficient permissions to access the data you want to migrate.
- Password: The password used to connect to the database.
- To enable traffic and connection between the source and target databases, ensure that you update or disable the firewalls that protect them. If necessary, you can temporarily disable the firewalls.
- A source Redis®* service that is secured with SSL is a default migration requirement.
- A publicly accessible source Redis®* service or a service with a VPC peering connection between private networks. The VPC ID and cloud name are required for the migration process.
AWS ElastiCache for Redis®* instances cannot have public IP addresses and thus require project VPC and peering connection.
Migrate a Redis®* database
Follow these steps to migrate a Redis®* database to Aiven for Redis®* service:
- Log in to the Aiven Console, and select the target Aiven for Redis®* service to which you want to migrate the Redis®* database.
- Click Service settings on the sidebar.
- Scroll to the Service management section, and click Actions (...) menu.
- Click Import database to initiate the import process.
- You will see a wizard that guides you through the database migration process.
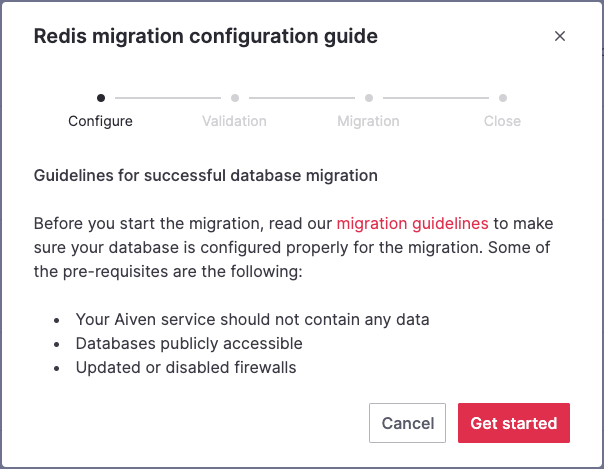
Step 1: Configure
Read through the guidelines on the Redis migration wizard and select Get started to proceed with the database migration.
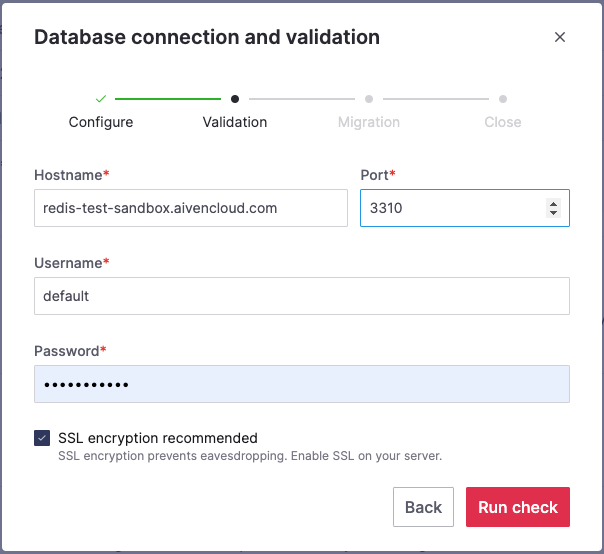
Step 2: Validation
-
On the Database connection and validation screen, enter the following information to establish a connection to your source database:
- Hostname: This is the public hostname, connection string, or IP address used to connect to the database.
- Port: The port used to connect to the database.
- Username: The username used to connect to the database.
- Password: The password used to connect to the database.
-
Select the SSL encryption recommended checkbox.
-
Select the Run check to validate the connection. If the check returns any warning, resolve the issues before proceeding with the migration process.
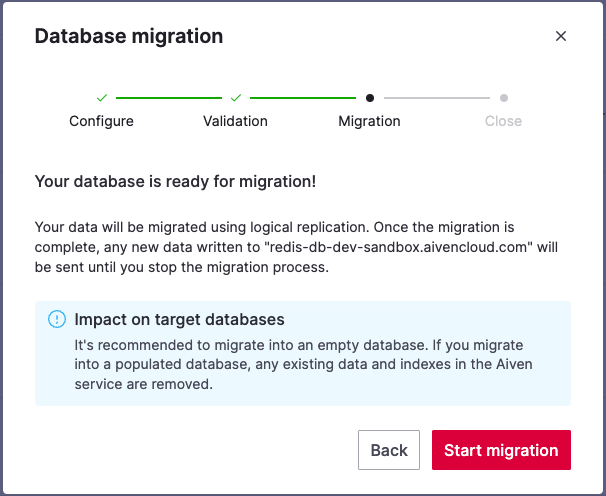
Step 3: Migration
On the Database migration screen, select Start Migration to begin the migration.
While the migration is in progress, you can
- Close the wizard by selecting Close window and check the migration status anytime by returning to the wizard from the service's overview page.
- Continue to write to the target database.
- Stop the migration by selecting Stop migration. The migrated data will be retained, and you can start a new migration.
If you choose to stop the migration, this action will immediately halt the replication of your data. However, any data that has already been migrated to Aiven will be retained. You can initiate a new migration later, and this process will overwrite any previously migrated databases.
If you receive such a notification, it is important to investigate the possible causes of the failure and address the issues. Once you have resolved the underlying problems, you can initiate the migration by choosing Start over.
Step 4: Close
When the wizard informs you about the completion of the migration, you can choose one of the following options:
-
Select Close connection to disconnect the databases and stop the replication process if it is still active.
-
Select Keep replicating if the replication is ongoing and you wish to maintain the connection open for continuous data synchronization.
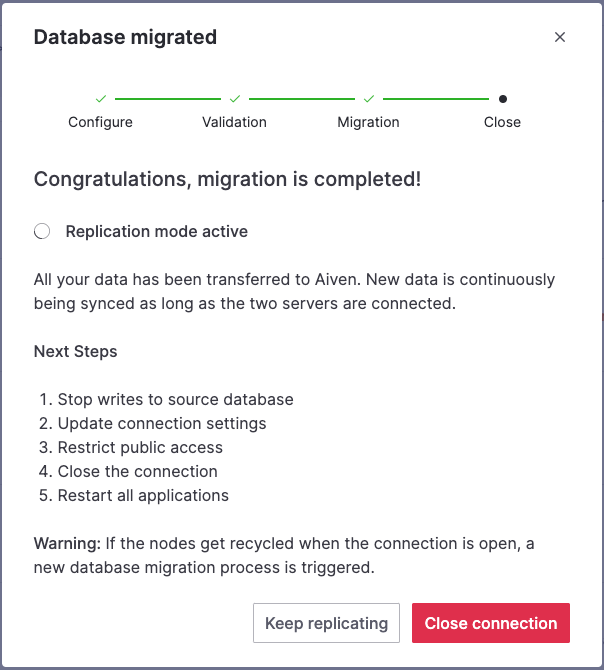
Your data has been successfully migrated to the designated Aiven for Redis database, and any subsequent additions to the connected databases are being continuously synchronized.